Showing posts with label Recipe - main course. Show all posts

Tuesday, January 24, 2012

Vegetarian cottage pie with cheesy parsnip and sweet potato topping - recipe

So, happy (very belated) New Year!  I hope you're all having a good start to 2012.

After a really excellent festive period, split between Wiltshire with my parents and Portugal with Marc's it was back to earth with a bump for me, as I faced a mountain of Uni work.  Three weeks later and I've emerged blinking into the daylight and am making a return to social media.  Miss me?!

January's such a miserable month that it's nice to treat yourself to some hearty comfort food.  This recipe for veggie cottage pie is a real winter-warmer.  It's going to wrap you up in a big warm snuggle and make you forget all about the grey day outside.

The cheesy parsnip and sweet potato mash is also really delicious on its own (try not to scoff it all before you top your pie with it!) and would work well as a side-dish.

Ingredients:
1 onion, chopped
2 carrots, finely chopped
100g mushrooms, sliced
Good glug of red wine (optional if you're still on a January detox!)
400g tin chopped tomatoes
400g tin green lentils
1 teaspoon each of thyme, oregano and rosemary (or your favourites)

For the topping:

400g sweet potato, peeled and roughly chopped
2 parsnips (about 250g), peeled and roughly chopped

100g cheddar cheese
Knob of butter

Method:


Pre-heat the oven to 180c

Gently fry the onions and carrot in a good glug of oil for 5 minutes, until softened.

Add the mushrooms and fry for another 2-3 minutes.  Add the wine and cook for a further 5 minutes.

Add the lentils, tinned tomatoes and dried herbs.  Season with salt and pepper.  Gently simmer for 20-30 minutes.

In the meantime, boil the sweet potato and parsnip for 10-15 minutes, until thoroughly soft.  Take off the heat and mash, with butter and cheese.  Season to taste.

Place the sauce in the bottom of an ovenproof lasagne dish.  Top with the sweet potato mash.  If you feel like you need an extra treat, you might want to grate a little more cheese over the top.

Place in the oven for 20-30 minutes, until nicely browned and slightly crispy on top.

Serve with green veg and a dollop of ketchup.  Classy!


Friday, November 25, 2011

Chestnut, mushroom and red onion pie - recipe

You just can't beat a pie on cold winter's evening.  This one is particularly seasonal, with chestnuts and mushrooms making up the filling.  It's also quite hearty and I guarantee it will appeal to veggies and carnivores alike (the Committed Carnivore said he'd like to eat it every day!).

I recommend using ready-made puff pastry - apparently even chefs don't bother making their own at home, as it's so fiddly, so don't feel guilty!

Ingredients (makes 2 substantial pies):

1 pack chestnuts 350g
1 red onion
Knob of butter or glug of oil
Glug of balsamic
150g shiitake mushrooms
200g chestnut mushrooms
1 garlic clove, finely chopped
100ml red wine
Handful fresh herbs (parsley and thyme)

1 pack ready-rolled puff pastry

Method:

Pre-heat the oven to 200c

Using a small, sharp knife, cut a cross into the round side of each chestnut.  Place cross-side up in a baking tray and roast for 25-30 mins.  Peel tough outer shell and inner skin and roughly chop. **You can use ready cooked chestnuts if you prefer**

Whilst the chestnuts are cooking, slice the onion and gently fry in a little butter or oil for 5-7 minutes.  Add a good glug of balsamic vinegar and cook for another 5 minutes over a low heat.

Add the garlic.  Cook for a further minute.  Add the mushrooms and chestnuts and stir to coat with onion mixture.

Pour in the red wine.  Simmer for 5-10 mins, until the wine has reduced down.

Season with salt and pepper and add the herbs.

Pour the mixture into individual pie dishes and top with puff pastry, cut to fit your pie dishes and crimped at the edges to seal.

Cook in oven at 200c for 25-30 mins, until the pastry has risen and is golden brown.

Mushrooms

Roasted chestnuts ready to peel

Ready to tuck in

Wednesday, October 12, 2011

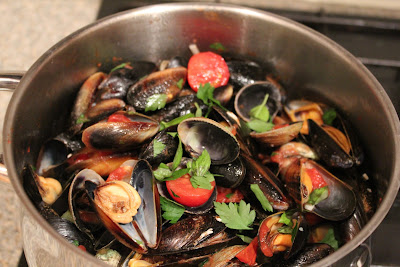
Mussels, clams and an Italian island hideaway - recipe

Last week's gorgeously hot weather made me wish I was on a beach somewhere eating fresh seafood and sipping chilled wine.  I couldn't do anything about the beach but I did manage to rustle up a pot of clams and mussels (and maybe a cheeky glass of wine or two!).

Last year, after going to an amazing wedding in Rome, we spent a few days on a tiny island called Ventotene.  It's a beautiful island, with crystal clear blue seas and picture-perfect pastel buildings.  The pace of life is leisurely, with days spent sunbathing, or wandering round the little village square and evenings enjoying the freshest seafood, washed down with carafes of house wine.  One of our favourite dishes was 'cozze e vongole' - mussels and clams.  My version below.

Ingredients (serves two for main, four for starter):
2 cloves of garlic, peeled and chopped
Handful of cherry tomatoes, halved
Good glug of olive oil
1 glass of white wine
1.5kg (total weight) clams and mussels
Handful of fresh parsley

Method:
Clean the mussels and clams by running under cold water.  Remove the beards from the mussels.  Discard any that do not close when run under cold water, or tapped firmly.

In a large saucepan, gently heat the olive oil.  Add the garlic and tomatoes and cook for 2 minutes.

Add the white wine and turn the heat up a little.

Add the clams and mussels.  Put a lid over the pan and allow them to steam, shaking the pan occasionally.

After 4-5 minutes they should be cooked.  They're ready when the shells are open.

Sprinkle with parsley and serve with some crusty bread.  And some sunshine if you can!


cozze-e-vongole
'Cozze e vongole'

mussels-and-clams
Delicious served with some fresh bread


The view from our hotel in Ventotene

The local supermarket!


Ancient Roman harbour


Back in Rome, everyone travels by scooter!

Saturday, August 27, 2011

As you like it - easy okonomiyaki recipe

Okonomiyaki is quintessential Japanese street food.  Fitting then that the first time I tried it was from a street stall off Brick Lane earlier this year.

I was over the moon to find out that Reiko included okonomiyaki on her home cookery course and even more delighted to find out how simple it was to make.

The beauty is, the quantities don't need to be too precise and you can use whatever toppings you fancy.  In fact, the name okonomiyaki means 'what you like'.  I've made versions using squid, prawns and mushrooms.  Meat eaters might want to add ham or bacon. You can read more about regional variations in the Wikipedia entry
What really makes this dish is the okonomiyaki sauce and the bonito flakes, which are both very distinctive flavours.  If you can't find an Asian supermarket near you, you can buy them online.


Ingredients (Makes 2 pancakes):
125g self-raising flour
1 teaspoon dashi powder (you can leave this out if you don't have any)
150ml water
2 eggs
4 leaves from a pointed cabbage (also known as sweetheart cabbage), chopped

To top:
Okonomiyaki sauce
Japanese mayonnaise
Bonito flakes
2 spring onions, finely chopped
Your choice of squid, prawns, mushrooms, ham

Method:
Mix the flour with the dashi powder in a large bowl.  Add the eggs and water and mix to a smooth batter.

Add the cabbage and mix.

Heat 1 tablespoon of vegetable oil in a large frying pan over a medium heat.  Spoon in half the mixture into the pan and gently flatten to about 1cm thickness.  Repeat with the remaining mixture (If your frying pan is big enough, cook both in the same pan).

Lay the squid/prawns/bacon on top of the pancakes.

Cook for about 10 minutes on a medium-low heat, until lightly browned on the underside.

Flip over and cook for a further 5-10 minutes.

Transfer the pancakes to plates.  Spread with okonomiyaki sauce, sprinkle with the spring onion, drizzle with Japanese mayonnaise and top with bonito flakes. 

Okonomiyaki - how I like it!


okonomiyaki-recipe
Okonomiyaki


Tuesday, July 26, 2011

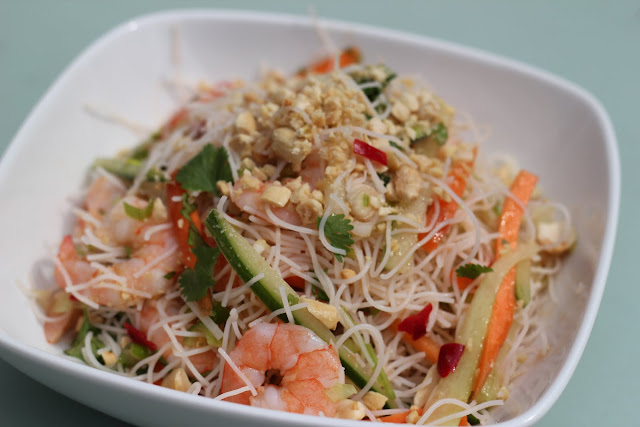
Vietnamese prawn salad - recipe

As summer seems to have returned, albeit in a rather half-hearted way, I thought it was time for a fresh, lively salad recipe.  As you've probably noticed, I'm really into Asian flavours at the moment and this recipe has a Vietnamese feel to it.

Ingredients (Serves 2):
1x 375g packet thin rice noodles, pre-cooked (in the fridge section of supermarket)
180g pack cooked & peeled tiger prawns, cut in half lengthways
Half a cucumber, deseeded and cut into matchsticks
1 carrot, cut into matchsticks

For the dressing:
1 garlic clove, finely chopped
1 red chilli, deseeded and finely chopped
1 tablespoon fish sauce
1 tablespoon caster sugar
Juice of 2 limes

For garnish:
3 spring onions, finely chopped
Handful of coriander, chopped
2 tablespoons roasted peanuts, crushed

Make the dressing by mashing the garlic, chilli and sugar in a pestle and mortar.  Add the fish sauce and lime juice and mix.

In a separate bowl, combine the noodles and vegetables.  Pour the dressing over and mix well.  Top with garnish ingredients and serve.


vietnamese-prawn-salad
Vietnamese prawn salad


Thursday, July 7, 2011

Summery salad (for not-so summery weather) - recipe

I actually made this salad just before I went on holiday but didn't get round to writing a post on it.  Lovely, light summery lunch.  I'm sure it tastes just as good in the rain though!  The peppery rocket works well with the tart lemon dressing and salty feta cheese.

I made it using English asparagus.  As the season has sadly now ended, you could replace asparagus with sugar snap peas if you wanted.

Ingredients (serves 2):
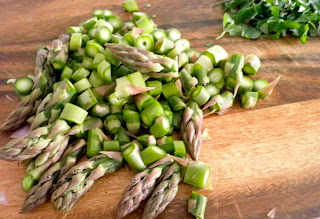
1 bunch asparagus (or sugar snap peas if you prefer), woody bit removed and spears cut into three pieces
1 courgette, cut into thin slices
2 spring onions, finely chopped
1 bag rocket
100g feta cheese crumbled or cubed (you could also use goats cheese)
Handful of fresh herbs, chopped (I used mint, basil and parsley but you could just use one)
Juice of half a lemon
3 tablespoons olive oil
Drizzle of olive oil for cooking

Method:
Drizzle asparagus and courgette with a little olive oil and cook in pre-heated griddle pan for 3-4 minutes, turning once during cooking.  Allow to cool slightly.

Mix spring onions, rocket, herbs in a bowl.

In a separate bowl, whisk together the olive oil and lemon juice to make a salad dressing.

Add the asparagus and courgette to the leaves, dress according to taste.  Serve sprinkled with feta cheese.

courgette, asparagus, feta, lemon, spring onion, rocket


courgette-and-asparagus-salad

Thursday, June 16, 2011

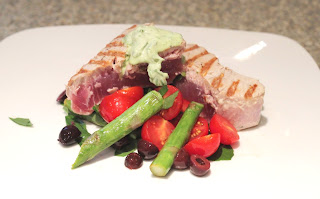
Tuna steak with asparagus, tomato and basil cream fraiche - recipe

I like Jamie Oliver.  There I said it.  Seems like a top chap to me.  I know people have mixed views and if, like my brother, you're less than keen on the personality I'd still recommend you try out some of his recipes.

For the most part they're pretty quick and straightforward (maybe not 30 minutes though, eh Jamie?!) but the best thing about them is that every one I've made has worked perfectly and tasted delish.

Last night we had tuna steak, with asparagus and cherry tomatoes and a basil creme fraiche. True to form it was really simple and totally scrumptious. Jamie's recipe is here.


Tuesday, June 14, 2011

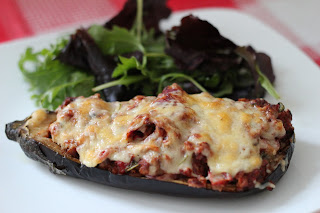
Stuffed aubergine - recipe

This dish got the thumbs up from the Committed Carnivore last night, even though I made it with Quorn mince.  You could just as easily make it with beef or lamb mince though, if you don't want to go the veggie route. 

Quick, easy, satisfying and tasty.  Perfect weeknight tea.

Ingredients (serves 2):
1 large aubergine
Half an onion, finely chopped
150g mince (Quorn, lamb or beef)
1 clove garlic, minced
400g tin chopped tomatoes
Squeeze of tomato puree
1 tsp dried oregano
Splash of Worcestershire sauce (optional)
Small handful fresh basil, chopped
75g grated cheese (I used a mixture of cheddar and parmesan)
Couple of glugs of olive oil

Method:
Preheat oven to 190c

Chop the aubergine in half lengthways.  Score the flesh (see pic) being careful not to break the skin.  Place in a baking tray, drizzle with olive oil and bake for 20-25 mins.

In the meantime, gently fry the onion.  Add the garlic, being careful not to burn, and the mince.  Add the tomatoes, tomato puree and oregano.  (If you're using meat, cook it for a few minutes before adding the tomatoes).  Simmer for 10-15 minutes.  Add the Worcestershire sauce and fresh basil. 

Once the aubergine is cooked (lightly browned and soft to the touch), scoop out the flesh to leave a shell - again be careful not to break the skin.

Chop up the aubergine flesh and add to the mince mixture.

Fill the aubergine shells with the mixture, sprinkle with grated cheese and return to the oven for 10-15 minutes.  I finished mine off under the grill to get the cheese really bubbling.

Serve with a green salad if you want to keep it healthy, or garlic bread if you don't.
Aubergine ready for the chop

Aubergine scored and ready for the oven

Stuffed with mince - just needs cheese


Et voila

Monday, June 13, 2011

Rocket, blue cheese, sweet potato and pine nut salad

Gluttonous June rolled on apace this weekend, with a University reunion in the Cotswolds.  It peed down with rain for most of the weekend, so who can blame us for sitting inside and filling our faces with food and booze?!

Anyway, for fear of developing gout and because of an impending holiday, I intend to eat a little more healthily for the next fortnight.  And evil booze... STAY AWAY.

Quick salad recipe below.  Not 100% fat free, due to the cheese and pine nuts but definitely better for you than chips.

Ingredients (Serves 2):
Bag of rocket or salad leaves
1 sweet potato
100g blue cheese, cubed (I used a Cornish blue)
Handful of pine nuts
Salad dressing of your choice (a simple mix of balsamic and olive oil works just fine)

Method:
Heat the oven to 180c

Peel the sweet potato and cut into cubes.  Place on baking tray, drizzle with a good glug of olive oil and roast for 20-25 minutes until soft.

Gently toast the pine nuts over a low heat.

Dress the salad.

Let the sweet potato cool slightly, then combine all the ingredients in a large bowl and serve.


rocket-blue-cheese-pine-nut-salad
Rocket and blue cheese salad


Thursday, June 9, 2011

Tofu bags - Japanese recipe

All the food we learnt to make at Hashi Cooking on Tuesday night was so delish, that I decided to make some of it again for tea last night. 

My sis and I did a supermarket sweep at a Japanese food shop (Atari-ya in Norbiton) the other week, so my cupboards are jam packed full with everything I need.  Although Japanese cooking does need special ingredients, there's not that many of them.  So, once you've got the basics you're away.

This recipe makes two veggie tofu bags and two egg tofu bags.  They can also be made with minced pork - replace the beans and mushrooms with 100g minced pork.

Ingredients (makes 4 tofu bags - plenty for a starter for 2 people):
2 deep fried tofu pockets (See pic - these are found in the freezer section of Japanese stores)
Half a tin of beans, well drained and blended in a food processor.  (I used mixed beans, we used borlotti at the class)
Small handful dried shiitake mushrooms, rehydrated and finely chopped
1 egg
Half a small carrot, finely chopped
1 spring onion, finely chopped
1tsp grated fresh ginger
1 tsp cornflour
Pinch of salt
Small handful of green beans (to serve)

You also need toothpicks, to secure the pockets.

Cooking liquid:
250 ml dashi stock (Buy dashi powder from Asian shops and mix with water according to instructions)
1 tbsp sake
1 dessert spoon sugar
1 tbsp soy sauce
**you may want to alter the amounts of these ingredients to personal taste**

Method:
Cook the tofu bags in a pan of boiling water for 1 minute and drain well.  Cut the bags in half, so you end up with four pockets, being careful not to tear them.

Mix all the ingredients for the cooking liquid in a small saucepan and bring to a simmer.

In a small bowl, mix the beans, mushrooms, carrot, spring onions, ginger and corn flour with your hands.  Divide into two and fill two of the tofu bags with the mixture.  Secure each bag at the top with a toothpick.

Fill each of the remaining two bags with an egg (this should be whole - i.e. not beaten) and secure with a toothpick.

Quickly place all the bags in the cooking liquid, trying to keep them upright.  Cover with a foil lid, to avoid parcels drying out.  Liquid should be gently simmering.  Cook for 20 minutes.

In the meantime, cook the green beans.

Once the tofu bags are cooked, remove them from the liquid and take out the toothpick.  Cut each in half and place one veg and one egg bag in a bowl.  Add the remaining cooking liquid and garnish with green beans.


Frozen deep-fried tofu bags, straight from the freezer

Veggie ingredients ready for mixing (all very finely chopped)


Tofu bags ready for cooking


Egg tofu bag after cooking.  Cut in half for serving.


Yum

Wednesday, June 8, 2011

Quinoa salad - Ottolenghi recipe

My lovely friend Helen made this quinoa salad for me for dinner one evening.  It's a tasty, light, summery dish, which will be just perfect if summer makes a reappearance.  The roasted sweet potato gives it a bit of oomph too, so it does fill you up.  Which I like.

I first ate quinoa in South America, where the Incas have been growing it for thousands of years - amusing really when you think how we've just 'discovered' it as a superfood here!

It's really not difficult to make but it does take a little bit of time.  Recipe courtesy of Yotam Ottolenghi,
very slightly adapted by me.

Ingredients:
2 medium sweet potatoes (about 350g each)
200g mixed basmati and wild rice (I used just basmati, as I didn't have wild)
200g quinoa (I bought mine from a health food shop but I think a lot of bigger supermarkets sell it now)
2 garlic cloves, peeled and very thinly sliced
3 tbsp shredded sage leaves
2 limes, juice and zest (the recipe calls for Iranian limes but I just used regular, sorry Mr Ottolenghi)
6 tbsp shredded fresh mint
4 spring onions, green part only, thinly sliced, plus extra to garnish
200g feta, broken into chunks
Olive oil
Salt and pepper

Preheat the oven to 200C/400F/gas mark 6.

Peel the sweet potatoes and cut roughly into 2cm dice. Drizzle with olive oil and sprinkle with salt and pepper. Roast for 20-25 minutes, until tender.

Meanwhile, cook the rice as per the packet instructions. Put the quinoa in a pan with lots of boiling water and simmer for 10 minutes. Drain into a fine sieve and leave to dry. Put the cooked and dry (but still warm) rice and quinoa in a large mixing bowl.

Heat a glug of olive oil in a small frying pan and cook the garlic for 30 seconds, or until it turns light golden. Add the sage and fry, stirring, for about a minute - make sure the herbs and garlic don't burn.

Tip the contents of the pan over the rice and quinoa, then stir in the roasted sweet potato and its oil. Add the mint, spring onion, lime juice and zest, feta and salt and pepper, toss together gently, taking care not to mush up the sweet potato and feta, taste and adjust the seasoning. Serve warmish, or at room temperature, garnished with spring onion.


Tuesday, May 31, 2011

Creamy tomato and prawn open lasagne - recipe

Open lasagne is much quicker and a little bit healthier than traditional lasagne.  For some reason, I always feel more inspired to tinker about with fillings too.

Last night's version was a creamy prawn and tomato sauce, with some peas and mushrooms thrown in for good measure - these could be left out if you prefer.

Ingredients (serves two):
6 dried lasagne sheets (I prefer to use fresh but the supermarket didn't have any)
Half an onion, thinly sliced (I used red but white would be fine)
1 large field mushroom / handful of normal mushrooms, thinly sliced
I clove garlic, minced
1 packet uncooked tiger prawns (cooked will do, if you don't have fresh - just cook for less time)
Small glass of dry white wine
4 tomatoes, skinned, deseeded and chopped (half a tin of chopped tomatoes would do nicely)
Handful of frozen peas, cooked
Splash of double cream, to taste
Handful of fresh basil
100g (or so) grated parmesan

Method:
If using dried lasagne, cook sheets according to instructions on the packet whilst you make the sauce (approx 10 minutes).  If using fresh pasta, cook when the sauce is assembled.

Gently fry the onion in olive oil over a low heat for 3-4 minutes.  Add the mushroom and garlic and cook for another couple of minutes.  Add the prawns (if using uncooked.  If you use ready-cooked prawns, add right at the end and just warm through).

Add the white wine and turn the heat up.  Simmer until the wine reduces down.  Add the tomatoes, stir in the double cream and heat through. 

Add the peas and basil.  Season with salt and pepper.

Assemble the lasagne.  Lay a sheet of pasta in a bowl, spoon over some of the tomato mixture and a sprinkle of parmesan.  Repeat with the other sheets.  Top with some more parmesan.


open-lasagne

Thursday, May 26, 2011

Asparagus and goats cheese risotto - recipe

Risotto is really easy to make and the best thing about it is that, once you've got a decent basic recipe sorted, you can add just about anything you fancy.  I'm making the most of asparagus season and thought I'd add in some goats cheese for good measure.

Jamie Oliver's basic risotto recipe, works every time.  I adapted it slightly this time, as I wanted to cook the asparagus in the risotto. If you wanted, you could follow the basic recipe, cook the asparagus separately and add it at the end.

My version of Jamie's recipe below:

Ingredients (Serves two greedy gannets):
1 pint veg stock
1 knob of butter
1 tablespoon olive oil
Half a red onion onion, finely chopped
1 clove of garlic, finely chopped
½ a head of celery, finely chopped
200g risotto rice (I use arborio rice. Make sure you do use risotto rice, or you won't get a creamy risotto)
1 small wine glass of dry white wine (you can use vermouth)

200g fresh asparagus, chopped in 1cm pieces
100g freshly grated Parmesan cheese

Handful of fresh herbs, roughly chopped (I used mint and parsley)
100g goats cheese (or as much, or as little, as you fancy)

Method:

Heat the stock in a saucepan and keep warm (not boiling)

In a separate pan, heat the olive oil and butter, add the onions and celery, and fry very slowly for about 10 minutes, without colouring.  Add the garlic and gently cook for another 2-3 minutes.

Add the rice and turn up the heat (to medium)

Vigorously stir the rice for a minute or two, until it starts to look slightly translucent.  Add the wine and keep stirring (the stirring is the key to a lovely creamy risotto)

Once the wine has cooked into the rice, add your first ladle of hot stock, a pinch of salt and the chopped asparagus.

Turn down the heat to a simmer so the rice doesn’t cook too quickly on the outside. Keep adding ladlefuls of stock and keep stirring.  Allow each ladleful to be absorbed before adding the next.

This should take 10-15 minutes, until the rice is soft - you will need to taste it.  If you run out of stock before the rice is cooked, add some boiling water.
Remove from the heat and add another knob of butter, parmesan and herbs. Stir well. Place a lid on the pan and allow to sit for 2 minutes.

Serve, with the goats cheese crumbled over the top.  And probably some more parmesan too! 


Thursday, May 19, 2011

Linguine with lemon, feta, basil and pine nuts - Recipe

There's a few pasta recipes that I make time and again.  This is one of my favourites.  It really only takes ten minutes or so to make and doesn't need any fancy schmanzy ingredients.  Winner.

The original recipe came from Gordon Ramsay, courtesy of The Times.  Back in the good old days, when they let us look at stuff for free.

I've slightly adapted the recipe to taste.  My version below.  Don't get hung up on exact measurements, just use this as a guide.

Ingredients (Serves two):
250g dried linguine (I use De Cecco)
2 tbsp olive oil
Juice and zest of 1 lemon
4 tbsp freshly grated parmesan
Leaves from a handful of basil
100g feta cheese, crumbled
2 tbsp toasted pine nuts

Method:

Put the pasta in a large saucepan of salted boiling water to cook - checking the packet for times (De Cecco recommends 11 minutes). 

Whilst the pasta cooks, prep your ingredients.  Be careful toasting your pine nuts (I just dry fry mine over a low-medium heat for a couple of minutes) - I burnt mine last night and had to start again.

When the pasta is cooked, tip it into a colander and drain off most of the water, leaving about 2 tablespoons in the pan. Return the pasta to the pan and add the olive oil, lemon juice and zest, parmesan, basil and three-quarters of the crumbled feta. Toss well and check the seasoning.

Served.
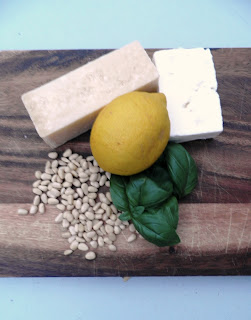
lemon-linguine-ingredients
Ingredients


Prepped ready to add to the cooked pasta

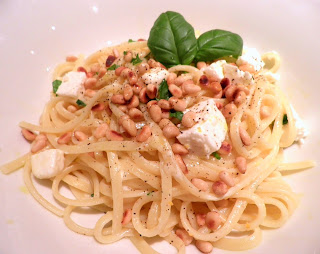
lemon-linguine
End result


Tuesday, May 17, 2011

Butternut squash and feta burritos - recipe

Mexican food seems to be getting ever more popular in London but, with more of a focus on authenticity and a modern twist, it seems the days of gaudy restaurants and sombreros might be on their way out.
Thomasina Miers' Wahaca chain is brilliant but the restaurants are a victim of their own success - queues are usually enormous (I've walked away more than once, I cannot stand queuing).

One of my Mexican 'specialities' is butternut squash, beans and feta burritos.  Apparently squash is an uber authentic ingredient - used by the Aztecs themselves (thanks Wikipedia).  I'm guessing Greek cheese wasn't really their thing - but hey, that can be my modern twist, soo 'on-trend' darling!

Buen provecho.

(sorry, the photos are a bit rubbish.  it was dark.  i was hungry)

Ingredients (makes four substantial burritos):
1 x large butternut squash
1 x onion (red or white)
2 x cloves garlic, finely chopped or minced
1 x 400g tin beans (I used kidney beans but black beans would work too)
100g feta cheese (more if you fancy it), crumbled
1 x fresh red chili, finely chopped
4 ready-made fajitas
100g cheddar cheese, grated

Method:
Pre-heat oven to 190c

Peel butternut squash using an ordinary veg peeler.  Chop in half longways.  Scoop the seeds out using a dessert spoon.  Chop into small chunks (see pic).

Heat some olive oil in a baking tray.  Add the butternut squash and cook for about 30 mins, until soft.

In the meantime, chop your onion and then gently fry it.  Add the chili and garlic and cook for another couple of minutes.  Add the (drained) beans.  Cook over a very low heat for ten minutes.  If the beans start to stick, add a couple of spoonfuls of water or stock. 

Add the cooked butternut squash to the beans and onions.  Add the feta and stir.

Now you're ready to put together your burritos.  Lay a tortilla out flat.  Spoon a quarter of the mixture into the middle.  Fold in the short edges first, then the long.  Lay on a baking tray with the folds on the bottom (This is difficult to explain, I should've taken pictures - this video demonstrates the technique http://www.ehow.co.uk/video_2298342_roll-beef-burrito.html )

Repeat with the other three tortillas, placing them side-by-side on the tray.  Sprinkle with the grated cheese and return to the oven for ten mins or so, until the cheese is melted.  (alternatively, grill for same results).

Serve with sour cream and tomato salsa.

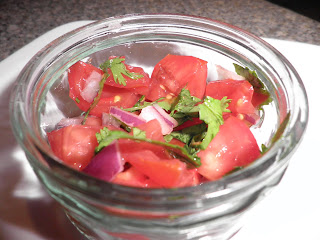
Quick tomato salsa recipe:
3 average tomatoes
Half a red onion
Half a red chili
Small handful of fresh coriander
Juice of half a lime

Roughly chop the tomatoes, how small is up to you.

Finely chop the onion and chili

Chop or tear the coriander.

Combine all ingredients in a bowl and squeeze the lime over. 


chopped-butternut-squash

tomato-salsa


butternut-squash-burrito

Monday, May 16, 2011

Halloumi salad - recipe

Fried halloumi is quite frankly delicious.  Salty, chewy and sort of squeaky.

To call this a recipe is a massive overstatement, you just need a block of halloumi cheese (which you can buy just about everywhere now), a squeeze of lemon and a finely chopped chilli, if you fancy a little heat.

Cut the halloumi into slices - around 0.5cm - 1cm should do it.

Heat a non-stick frying pan over a medium heat (if you're worried about the cheese sticking, you could use a tiny bit of oil) add the cheese slices in and cook gently for a few minutes on each side.  The cheese is cooked when it's lightly browned - keep an eye on it though, it does burn quite easily.

Squeeze a little lemon juice over the cheese and sprinkle with fresh chilli (if using).

I served mine as a starter with a tomato salad (chopped tomatoes, cucumber, red onion and mint leaves dressed with a little olive oil and white wine vinegar).


halloumi-salad

Sunday, May 15, 2011

Asparagus tart - recipe

With asparagus season well under way, I thought it was fine time I made the most of it.

An uber simple asparagus tart makes a lovely light summer lunch.  Even when the sun didn't really make an appearance...

Ingredients:
Ready made, pre-rolled puff pastry (I used Jus Rol from the fridge section)
Tomato puree
Fresh asparagus
Gruyere cheese, grated (parmesan or cheddar would work too)
Melted butter

Method:
Pre heat the oven to 180c Cut out a rectangle of puff pastry per person and score a smaller rectangle with a knife (see pics).  Place on a sheet of baking parchment on a baking tray.

Spread a little tomato puree onto the pastry.

Sprinkle with gruyere cheese (Next time I make this, I'll use a little more than the pics below)

Remove the woody bits from the asparagus (if you bend the asparagus spear towards the end, it should naturally break at the point it becomes woody) and place on the pastry.

Sprinkle with some more cheese and brush pastry and asparagus with melted butter.

Pop in the oven for about 20-25 minutes, until the pastry is nicely golden and crispy

Serve with a simple salad.  We had lovely peppery watercress drizzled with olive oil.


Ready-made, ready-rolled puff pastry, genius.

Spread with tomato puree

Sprinkle with cheese


asparagus tart
Enjoy

We ate ours in the garden, whilst admiring our lovely rose bush!

Saturday, May 14, 2011

Spinach and feta pie - recipe

I'm a big pie fan.  Ask any of my family and they'll tell you that the best pies of all time came from Darwin market (Lancashire).  Darwin is where my Gran and Grandpa lived - and where my Dad grew up.  Whenever we went to visit, there was always a trip to Darwin market to stock up on pies: steak pies, minced meat pies, apple pies and wimberry pies.  Our freezer was always full of pies.

My favourite was the wimberry pie.  As far as I can tell, wimberries are a Northern thing.  They're pretty similar to a blueberry but much juicier and more flavoursome.  I might try making a pie with blueberries to see how it measures up.

I thought a spinach and feta pie would be a nice summery choice for a weeknight tea - I remember eating something similar on holiday in Greece.  I was really pleased with how it turned out - totally delish served with a tomato salad and some buttered jersey royals.

Writing this post is proving difficult, as I've got a sleepy kitten climbing all over me and demanding attention!

Ingredients:
1 red onion, sliced
2 garlic cloves, finely chopped or crushed
1 bag of fresh spinach leaves (250g), washed and drained
Half a nutmeg nut finely grated, or a teaspoon of dried nutmeg
1 pack of feta cheese (200g)
2 eggs, beaten
2 tablespoons of pine nuts, lightly toasted
6 sheets shop-bought pre-rolled filo pastry (I used Jus Rol, from the fridge section.  You can also buy it frozen but make sure it's fully defrosted before use)

Method:
Turn the oven on to 180c

Gently fry the onions in a little butter or oil until soft and cooked through but not browned.  Add the garlic and cook for a couple of minutes, being careful not to overcook it.

Over a very low heat, add the spinach to the onions and garlic and cook until wilted.  It helps to keep turning the spinach, to make sure it cooks evenly.

Tip into a bowl, draining off excess liquid.  Leave to cool for a few minutes, then add the nutmeg, eggs, toasted pine nuts and crumble in the feta.  Mix well.

Butter a 20cm loose-bottomed cake tin.

Layer approximately 6 sheets of filo pastry, with plenty overhanging the tin.  Lightly brush each sheet with butter as you go.

Tip the spinach mix in and scrunch over the excess pastry.  If the pastry doesn't quite cover the spinach mix, use another sheet of filo to fill any gaps.

Brush the top with a little more butter and pop into the oven.

Bake for approximately 30 minutes, until the pastry is crisp and golden.


spinach-and-feta-pie